
Do you want to transform your space with gorgeous mosaic tiles? If yes, then you may be wondering how to begin preparing your surfaces for Lakeland mosaic tile installation services. Whether it is your bathroom, kitchen, or accent wall, surface preparation is important for a perfect finish. In this blog, we will walk you through each step so that your surfaces are prepared to display gorgeous mosaic tiles. By the time you finish reading this, you will have everything you need to know in order to prepare like a pro, securing lasting beauty and durability in your tile installation.
Evaluating Your Surface With Lakeland Mosaic Tile Installation Services
Before you start the installation, it's crucial to assess the state of your surface. Is it level and smooth, or cracked and uneven? For mosaic tiles to appear at their best and stick properly, your base must be as flat as possible. Here's what to look for:
-
Check for any damage: Repair holes or cracks with an appropriate filler.
-
Level the surface: Check for flatness using a spirit level.
Add leveling compound if required. This initial test will pave the way for a successful mosaic tile installation.
Cleaning and Priming
And now, it's time for cleaning. Dust, grease, and residue can all prevent the tiles from adhering. Begin with a good clean using a degreaser, and then follow up with a clean water rinse. Once the surface dries, a primer should be applied. Why a primer? It makes the adhesive stick to the surface more effectively, with a better hold for your tiles. Let the primer dry as per the manufacturer's instructions before proceeding to the next step.
Applying the Right Adhesive
Selecting the proper adhesive is similar to choosing the ideal glue for an important project. A quality thin-set mortar is typically your best option for mosaic tile installation. It's formulated for improved hold and flexibility, which is necessary for the tiny pieces in a mosaic. Apply the adhesive with a notched trowel, ensuring it's level but not too heavy. This will allow each mosaic piece to fit perfectly and stick well.
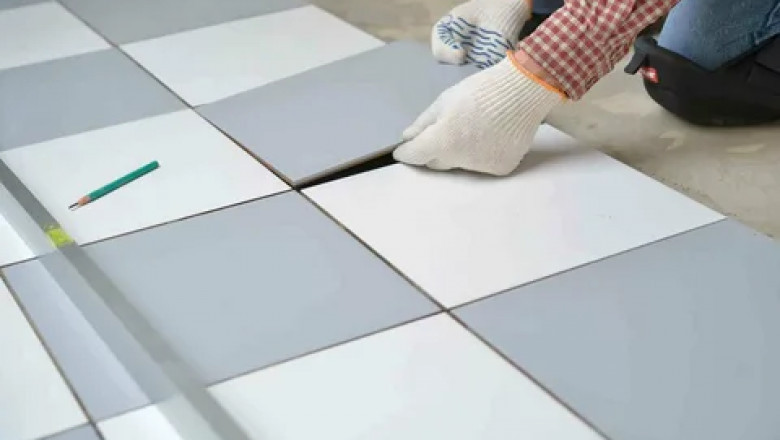
Laying Down the Tiles
It's showtime—now it's time to lay down the tiles! Start in the center and work outwards to achieve your pattern symmetry. Tuck each tile into the adhesive firmly but gently so that it adheres well. Use tile spacers to keep even gaps between the tiles for grouting. All this attention to detail will be worth it when you view the stunning, even finish.
Sealing and Grouting
It's grouting time once your tiles are in place and the adhesive has hardened. Select a grout color that will complement your tiles to give your mosaic that extra oomph. Spread the grout evenly, forcing it into the spaces between the tiles. When the grout is set, clean the surface with a damp sponge to eliminate excess grout. Finally, choose Lakeland mosaic tile installation services to keep your mosaic dry and stain-free so it can continue to be beautiful for years.
Handling Mosaic Tile Sheets
Mosaic tiles tend to be supplied in sheets, which are simpler to lay over a big area. However, these sheets can be difficult to handle. Have the mesh backing facing you and the tiles towards the adhesive surface. Roll the sheet slightly to accommodate curves or corners, and always double-check alignment before pushing into position. So, this technique keeps your layout even and ensures that each tile does not shift, which is important for attaining that perfect finish you want for your mosaic tile installation.
Best Cutting Methods
Sometimes, you might have to cut tiles to cover edges or tiny areas. This is how you can do it without breaking or chipping your lovely tiles:
-
Utilize a tile nipper: Excellent for minor cuts or curves.
-
Use a wet tile saw: This tool is ideal for straight, clean cuts across several tiles.
Furthermore, cutting tiles correctly means that even the edges and corners are professionally done, preserving the continuity and beauty of your mosaic design.
Quick Fixes for Common Issues
You may experience a few bumps along the way at any mosaic tile installation. Here's how to fix them:
-
Are the tiles not sticking? Check whether your adhesive has been set for too long before application.
-
Uneven tiles? Tap them gently with a rubber mallet to even them with adjacent tiles.
-
Grout haze? Wipe with a soft cloth and a small amount of vinegar and water.
Moreover, choosing a Lakeland mosaic tile installation services will keep you going without sacrificing momentum or quality in your installation.
Protecting Your Mosaic Tile Work
Protection is the key to longevity after your tiles are installed and grouted. Seal the grout to protect against moisture and stains. Follow these steps:
-
Select the proper sealer: Use a penetrating sealer for optimal results.
-
Apply evenly: Apply with a small brush or sponge.
-
Reapply as needed: Depending on traffic and usage, reseal every one to two years.
So, protecting your mosaic ensures it remains as vibrant and intact as the day it was installed, adding lasting beauty to your space.
Making your surface ready for mosaic tile installation services may look like a huge undertaking, but it's all about having the details right. Through these steps—evaluation, cleaning, priming, applying adhesive, tile laying, and finishing with grout and sealant—you ensure that the final product is beautiful and long-lasting. A good installation begins with excellent preparation, after all. Equipped with Lakeland mosaic tile installation services, you can now revolutionize your space with stunning mosaic tiles that will leave anyone who sees them in awe.


Comments
0 comment