
Clean water is essential for health and hygiene. We use it for drinking, cooking, bathing, washing, and many other daily needs. But have you ever thought about where this water comes from before it reaches your tap?
In many homes and buildings, water is stored in tanks before use. These tanks can be above ground (like on rooftops) or underground. Over time, dirt, algae, and bacteria can build up inside them. That’s why cleaning water storage tanks is very important. But cleaning them must be done the right way and, more importantly, done safely.
In this blog, we will explain everything you need to know about safe water storage tank cleaning. We will break down the steps, safety precautions, and share helpful tips—all in simple, clear English.
Why Cleaning Your Water Tank Is Important

Health and Safety Start With Clean Storage
Water tanks may look clean from the outside, but the inside can hide many things you don’t see. When tanks are not cleaned regularly, this is what can happen:
- Dirt and sand settle at the bottom.
- Algae (a green slimy substance) grows from sunlight and moisture.
- Bacteria and germs multiply in stagnant water.
- Rust or flakes come from old or metal tanks.
- Insects, lizards, or rodents may enter through open lids or vents.
All of these can make the water unsafe to use. Dirty tank water can cause:
- Stomach infections
- Skin problems
- Bad smell or taste in water
- Clogging of water pipes
Regular tank cleaning keeps your water safe, clean, and healthy.
How Often Should You Clean Your Water Tank?
Setting the Right Cleaning Schedule
Experts recommend cleaning your water tank every 6 months. However, you may need to clean it more often if:
- You live in a dusty or high-pollution area
- Algae or green growth appears
- You notice a change in water smell or color
- The tank has been unused for a long time
By sticking to a regular schedule, you can avoid major health risks and increase the life of your water system.
What Is the Safe Way to Clean a Water Storage Tank?
A Step-by-Step Guide to Safe Tank Cleaning
Cleaning a tank involves more than just emptying it and rinsing it. Let’s walk through the safe cleaning process, which is usually followed by professionals.
Step 1 – Inspection and Safety Checks
Look at the Condition of the Tank
Before starting, professionals check the tank’s:
- Size and shape
- Material (plastic, concrete, metal)
- Location (above ground or underground)
- Visible dirt or damage
They also check if the tank is easy to access or if it needs safety gear like ladders or ropes.
Step 2 – Turn Off Water Supply and Drain the Tank
Shut Down the Inlet Pipe
To avoid new water coming in during cleaning, the inlet valve is closed. Then, the existing water is drained through the outlet pipe or by using a pump.
If the tank has a lot of dirt at the bottom, it may be manually removed with buckets before cleaning starts.
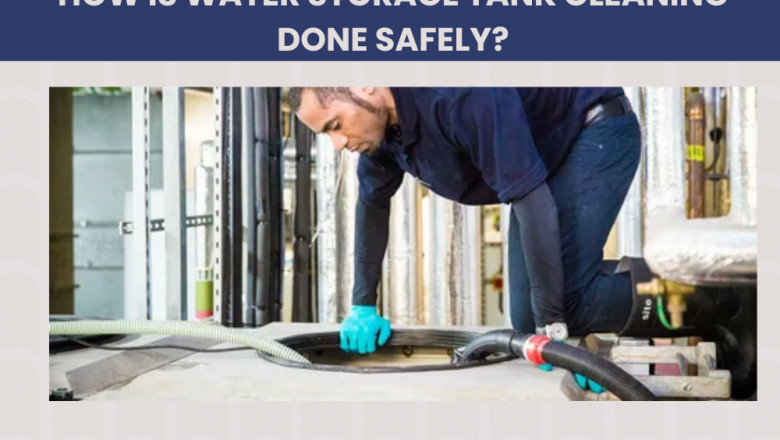
Step 3 – Wear Proper Safety Gear
Protecting the Cleaner
Cleaning a tank, especially a large one, can be risky. That’s why professionals wear:
- Rubber gloves
- Safety boots
- Face masks
- Safety helmets (for underground tanks)
This keeps them protected from slipping, inhaling fumes, or touching germs.
Step 4 – Scrub the Inside of the Tank
Remove All Dirt, Sludge, and Algae
Using long-handled brushes or scrubbers, the cleaner scrubs the tank’s:
- Bottom
- Sidewalls
- Corners
- Lid and entry area
They use mild soap or tank-safe cleaning agents. In some cases, high-pressure water jets are used for tough stains or slime.
Step 5 – Use Safe Disinfectants
Killing Germs the Right Way
Once the tank is physically clean, the next step is disinfection. This means removing bacteria, viruses, and other harmful microbes.
Common disinfectants used:
- Bleach solution (in small, safe amounts)
- Chlorine tablets
- Food-grade disinfectants
The solution is left in the tank for 15 to 30 minutes, so it kills all germs. Then it is drained and flushed out completely.
Step 6 – Rinse Thoroughly
Remove All Traces of Chemicals
After disinfection, the tank is rinsed 2–3 times with clean water. This ensures:
- No cleaning products are left behind
- Water doesn’t smell or taste funny
- It’s safe for drinking and daily use
Skipping this step can lead to health risks, so it’s very important.
Step 7 – Drying and Final Checks
Air Out the Tank
Once cleaned and rinsed, the tank is left open for air drying. Professionals also:
- Check for cracks or leaks
- Make sure the lid is sealed properly
- Clean the tank’s surroundings
After the tank is dry, it is ready to be filled again with clean water.
Common Safety Tips During Tank Cleaning
Simple Rules That Help You Stay Safe
Whether you clean your tank yourself or hire a service, these safety tips must always be followed.
1. Never Enter a Closed Tank Alone
Tanks can have poor airflow, especially underground ones. They may contain harmful gases. If someone must go inside, there should always be another person outside.
2. Avoid Strong Chemicals
Do not use acid, toilet cleaners, or industrial chemicals. These can be dangerous and hard to rinse out.
3. Use Clean Tools
Use separate brushes and buckets only for the tank. Do not mix them with bathroom or floor cleaning tools.
4. Use Water-Safe Disinfectants
Only use disinfectants made for drinking water storage. Ask a professional or check the product label.
5. Don’t Skip the Rinse
Even a small amount of cleaning solution left inside can make water unsafe. Always rinse multiple times.
Should You Hire a Professional Cleaning Service?
Doing It Yourself vs. Getting Expert Help
You can clean small home tanks yourself, but for larger or underground tanks, professional cleaning is the safest choice.
When to Call the Experts
- Tank size is too big or hard to reach
- It hasn’t been cleaned in years
- You see mold or algae growth
- It’s a commercial or public water tank
Professionals have:
- Safety gear
- High-pressure equipment
- Training in safe cleaning methods
- Experience in handling all tank types
How to Keep Your Tank Clean After Cleaning
Smart Maintenance Tips
Keeping your tank clean doesn’t stop after one cleaning. Here’s how to keep it fresh longer:
1. Keep the Lid Closed Tightly
Open lids invite insects, dust, and animals. Make sure your tank has a proper cover.
2. Install a Filter at the Inlet
Water coming in should be filtered to reduce the amount of sand, leaves, and debris entering the tank.
3. Use Water Regularly
Stagnant water becomes dirty faster. Use your water frequently and refill with fresh water when possible.
4. Watch for Signs of Dirt
Be alert to:
- Bad smells
- Water discoloration
- Slippery tank walls (sign of algae)
- Floating debris
Early signs help you act before things get worse.
Conclusion
Clean Tanks = Clean Water = Healthy Life
Water storage tank cleaning may sound like a small task, but it plays a big role in your health and safety. A dirty tank can spoil even the cleanest water. And unsafe cleaning can make things worse.
By following the right steps, using safe materials, and sticking to a cleaning schedule, you can make sure your tank always stores safe and clean water. And when in doubt, don’t take chances—hire professionals who know how to do the job safely and properly.
For more insightful articles related to this topic, feel free to visit: npr.eurl.live.


Comments
0 comment