
If your pipes sound like a haunted house or you’ve got more leaks than a toddler’s sippy cup, chances are you’ve been told you need whole-house repiping. Sounds intense, right? But don’t worry—it’s not as scary as it sounds. In fact, with modern Sun Valley repiping services, the process is smoother than ever.
More and more homeowners are opting for full-home repiping due to aging infrastructure, water pressure problems, or persistent plumbing issues. And while the word “repiping” might trigger budget nightmares, it’s actually a smart investment that boosts your home’s health and value.
Let’s dive into what really happens during a whole-house repiping project, step by step—and why you don’t need to panic.
-
Sun Valley Repiping Services for Inspection and Planning
Before any work begins, the plumbing team needs to know what they’re dealing with. They’ll inspect your current piping layout and note where old pipes run through walls, floors, and ceilings.
Callout Box: Tip: Always ask for a detailed inspection report—it’s your game plan.
Once that’s done, you’ll go over materials (PEX, copper, CPVC), budget, and project timelines. Good plumbers won’t just tell you what to do—they’ll walk you through it.
Planning Phase Includes:
-
Mapping out every pipe that needs replacing
-
Deciding where access points will be made
-
Notifying you of any temporary shutoffs
It’s a lot like prepping for surgery—careful planning makes the operation smooth.
-
Shut Off the Water and Prep the Area
Next up: shutting off your water supply. This sounds obvious, but it’s a big moment. Once the water’s off, the team can safely begin the job.
While the crew preps your home, you’ll want to:
-
Clear space around sinks, appliances, and water heaters
-
Cover furniture and valuables
-
Be ready for a little noise (and maybe a lot of dust!)
“Every great plumbing project begins with one thing—preparation.”
Depending on your layout, you might even get a few small holes in the drywall—but they’ll be patched up beautifully later.
-
Out With the Old (Pipes, That Is)
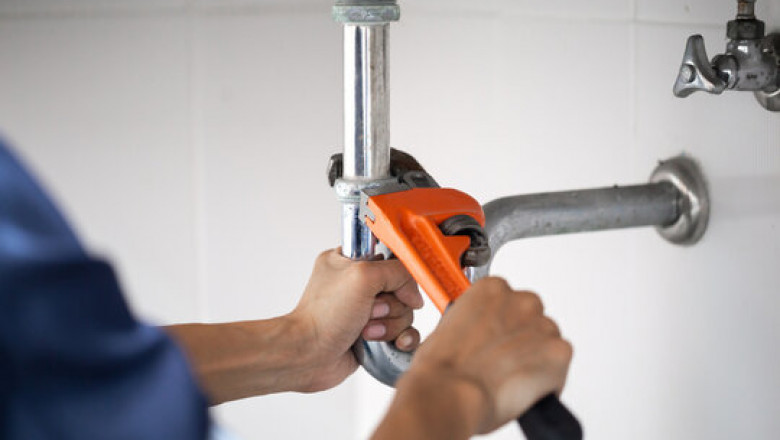
Now comes the fun part—removing your old pipes. Most homes have galvanized steel or older copper, and that’s seen better days. These materials are prone to corrosion, rust, or mineral buildup.
Here's how it happens:
-
The crew also locates and removes outdated lines.
-
Strategic wall/floor access is created—no random cutting!
-
Sections of pipe are taken out systematically.
Sometimes, Sun Valley repiping services take 1–2 days just for this step, especially in older homes. But trust the process—your plumbing is getting a glow-up.
-
In With the New—Installing Fresh Pipes
Once the old system is out, the new pipes go in like a breeze. Today’s materials are lighter, more durable, and also faster to install.
Callout Box: Did you know? PEX piping can expand and contract with temperature, making it less likely to burst in freezing weather.
Installation Includes:
-
Running new pipes through walls, ceilings, and underfloors
-
Hooking them up to key fixtures (sinks, toilets, etc.)
-
Securing them properly to avoid vibrations or leaks
Installers also work methodically to ensure everything fits like puzzle pieces.
-
Testing, Testing… 1, 2, 3
You don’t want to find out if your new pipes leak during your first shower, so this step is key. Moreover, the plumber will conduct a full pressure test to make sure everything’s sealed tight.
“Always test under pressure. If it can handle this, it can also handle anything your household throws at it.”
Testing Checklist:
-
Run water through every tap
-
Check for hidden leaks or air pockets
-
Confirm hot/cold lines are correctly installed
If anything’s off, it’s fixed before the walls go back together.
-
Patching, Painting, and Clean-Up
After the plumbing is done and tested, it’s also time to make your house look normal again. Small holes in drywall get patched, painted, and sanded until you never know a project happened.
Callout Box: Tip: Also, ask your plumbing company if drywall repair is included in the quote. Some include it, some don’t!
The crew also:
-
Cleans up debris
-
Reinstall any fixtures or panels
-
Makes sure water is flowing beautifully again
So not only do you get new pipes—you get peace of mind and a tidy home, too.
-
When It Pays to Go Pro with Repiping
Many folks wonder, “Can I DIY this?” Sure, if you enjoy chaos, water damage, and potential city code violations.
Professionals Sun Valley repiping services follow code, pass inspections, and come with warranties. More importantly, they also get it done fast—so you’re not stuck without water for weeks.
Here’s why going pro is smarter:
“Saving a few bucks today might cost you thousands later. Plumbing isn’t the place to cut corners.”
-
Is Every Pipe Replaced? What to Expect
Great question! In most whole-house repiping jobs, every supply line (water in) also gets a replacement. Drainpipes (water out) may or may not be swapped out, depending on their condition.
So yes, expect:
-
New pipes from the water main to your faucets
-
Fresh lines to all bathrooms and kitchen
-
New shutoff valves and sometimes even new hose bibs
Sometimes, water heaters and filters also get upgraded, too—ask your plumber!
-
How Long It Takes and What It Costs
Project timelines vary. A small home may take 2–3 days; a larger or older home might need a full week. The good news? You usually don’t have to vacate the house.
Callout Box: Tip: Stagger work on different areas, so you always have at least one working bathroom.
Typical Repiping Timeline:
Costs also depend on size, pipe material, and labor. But remember, good plumbing pays off with better pressure, cleaner water, and fewer headaches.
-
A Fresh Start Beneath Your Floors and Behind Your Walls
By the time your repiping project is complete, you’ve got a whole new plumbing system—without the old mystery drips and rusty surprises. More importantly, your family can also enjoy clean water, steady pressure, and fewer repair bills.
And while it may feel like a big project at first, homeowners often say the upgrade was “the best decision I ever made.” That’s because repiping services don’t just fix problems—they prevent future ones, too.
Whether your pipes are whispering warnings or yelling SOS, repiping is a wise move for long-term peace of mind. So if your plumber says it’s time, don’t sweat it—think of it as your home’s plumbing makeover.
A Whole-House Plumbing Upgrade? It’s Easier Than You Think
Surprise! Repiping your entire house isn’t as disruptive as it sounds. So, thanks to modern tools, faster materials, and expert crews, most homes are up and running again in just a few days. No more leaky nightmares. No more rust-colored water.
Just fresh pipes, happy plumbing, and a future with zero gurgles.
So, whether you’re dealing with old galvanized lines or just tired of those random drips at 3 AM, don’t wait. Call in the pros, ask about Sun Valley repiping services, and enjoy a cleaner, safer home from the inside out.


Comments
0 comment