views
How to Lay Pavers on a Slope Without Them Shifting
Sloped yards present both a challenge and an opportunity. On the one hand, gravity can cause pavers to slide, shift, or settle unevenly. On the other hand, a well-designed paver installation on a slope adds stunning dimension and functional elegance to your landscape.
If you're wondering how to lay pavers on a slope without them shifting over time, this guide walks you through the entire process—from grading and excavation to compaction and drainage—so your project stays beautiful and solid for years.

Start with a Solid Foundation
Before tackling slopes, it's critical to understand the basics of paver installation. Our guide on How to Lay Pavers covers flat-surface techniques. When you're ready to handle terrain changes, reach out to the team at Lakota Design Group. We specialize in slope solutions that combine safety, structure, and standout design.
1. Evaluate the Degree of Slope
The first step is to understand the slope you're working with. Use a long level, string line, or laser level to measure the incline.
- A mild slope is less than 10%
- A moderate slope ranges from 10–20%
- Anything steeper may require retaining walls or steps
Knowing your slope helps determine whether you’ll need grading, terracing, or base reinforcement.
2. Plan for Drainage First
Water is the biggest enemy of any paver project on a slope. Proper drainage ensures water flows away from the installation, not underneath it.
To prevent erosion or movement:
- Grade the slope away from structures (a minimum 1–2% grade)
- Add a French drain or perforated pipe if runoff is high
- Use permeable pavers or sand-filled joints to allow drainage
Avoid sealing your paver joints unless your drainage is perfect—trapped water can lift pavers from beneath.
3. Excavate and Create a Stepped Base
Instead of digging a flat surface, you'll need to excavate in stepped levels—kind of like shallow stairs—to create a terraced base.
- Each step should be 4–6 inches deep
- The width of each step matches your paver length or pattern
- Dig down to account for the base layers (gravel + sand)
Stepped excavation helps "lock" the pavers into place, reducing the risk of sliding downhill.
4. Install a Reinforced Gravel Base
A strong base is even more essential on a slope. Use:
- Class II road base or crushed gravel (4–8 inches deep)
- Compact each step individually with a plate compactor
- Consider geogrid reinforcement fabric between layers to stabilize
Compact thoroughly after every 2 inches of gravel. Poor compaction = pavers that shift, no matter how level they appear at first.
5. Add a Layer of Bedding Sand
Once your stepped gravel base is firm and compacted, add 1 inch of bedding sand (washed concrete sand preferred). Use a screed board to smooth it across each level, keeping it even but not compacted yet.
On slopes, you may also choose to use polymeric bedding sand for added stability. It helps lock pavers together once cured.
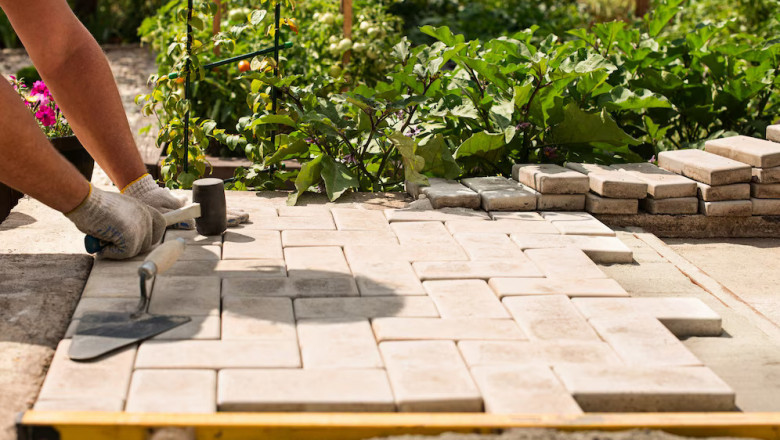
6. Lay Pavers Starting at the Bottom
Gravity works in your favor if you start at the bottom of the slope and work upward.
- Lay pavers tightly together in rows or staggered patterns
- Press each one into the sand by hand
- Use spacers or consistent gaps for even joints
If you're using a pattern, make sure it lines up across the steps. You’ll likely need to trim some pavers for clean transitions.
7. Install Solid Edge Restraints
Edge restraints are non-negotiable on slopes. Without them, the whole installation can eventually shift or collapse.
Use:
- Metal, concrete, or plastic paver edging
- Anchored deeply on both sides of the slope
- Anchored every 8–12 inches
On the downhill side, edge restraints bear the most pressure, so anchor them more securely and backfill with gravel for added weight.
8. Compact and Lock the Pavers
Once the pavers are in place, run a plate compactor over the entire surface with a protective pad to avoid chipping.
Then sweep polymeric joint sand into the cracks and gaps:
- Fill every joint completely
- Mist lightly with water to activate the binding agent
- Let it cure without rainfall for 24–48 hours
This locks the pavers in place and prevents weed growth, insect nesting, and shifting over time.
9. Add Retaining or Transition Features if Needed
If your slope is steep or you’re working with different elevation zones, consider adding:
- Retaining walls
- Paver steps
- Planter boxes
- Turf terraces
These features provide both visual interest and structural support, while also helping manage runoff and soil stability.
10. Maintain with Annual Inspections
Even perfectly laid pavers on a slope need upkeep. Every year:
- Check for shifting, cracking, or water damage
- Refill joint sand as needed
- Inspect edge restraints for movement
Catch issues early, and your slope will stay safe, stunning, and solid for the long run.
Final Thoughts
Slopes don’t have to be a deal-breaker when it comes to laying pavers. With the right steps—literally—you can create patios, walkways, or driveways that are both functional and eye-catching. The key lies in careful planning, stepped excavation, and proper compaction.
For more guidance, explore our full installation guide on How to Lay Pavers. And if you’d rather leave your sloped project in expert hands, contact Lakota Design Group for custom slope solutions tailored to your property.


Comments
0 comment